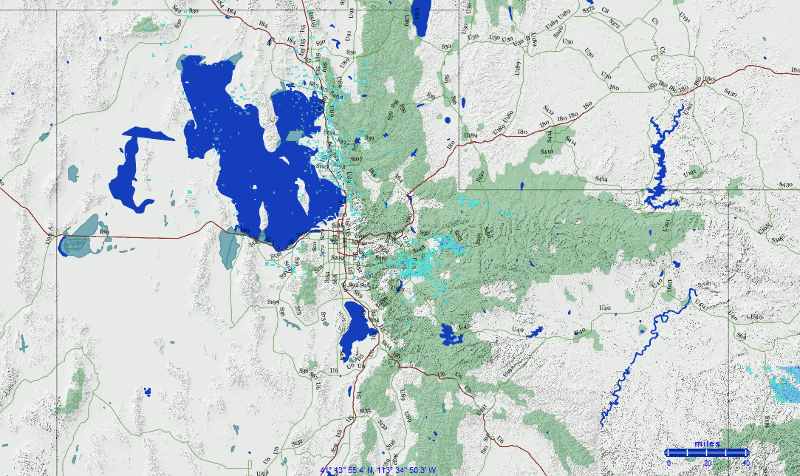
Weather in Northern Utah: A Map Tutorial
This tutorial gives step by step instructions on how to make this map of Northern Utah.
1. Login and unlock the layers — If you need help with this part see the Logging In and Managing Your Account tutorial.
2. Zoom into Northern Utah — The easiest way to do this is to use the Zoom Box. tool on the toolbar and draw a box around Northern Utah.
3. Change the Base Layer — The default base layer has a lot of data on it that we don't need, so we'll change it to a basic one. On the panel on the left side of the screen, click the 'Layer' tab. This will show you a list of folders with layers in them. Click on the folder labeled 'Base Layers'; from the list inside choose 'Simple Base 1.'
4. Add the Weather Layer — The purpose of this map is to show weather, so let's add that layer first. In the layer files open the 'Overlays/USA/Weather and Air' folder. We want the weather to be up to date, so select 'Weather Radar Current.' Depending on the weather, there may not be much to see, but you should see the weather radar come up.
5. Add the Highways and Lakes layers — It is hard to understand the weather unless we have more information on the map to reference it against. The Great Salt Lake is in Northern Utah, so it would be a good landmark to use; also national highways help many people understand the space better. Above the panel with folders of layers click on the 'Search' tab; this will help us find layers if we don't know where to find them in the folders. In the search box type 'Highways' and press enter. In a moment the results come back with a few different layers called Highways. The words under the name of the layer let you know what folder the layer is in. Select the one in the USA/Trans folder. Do the same thing for the word 'Lakes.' Choose the layer in the 'Worldwide' folder.
6. Fix the layer stack — At this point if you look close, you will notice that the weather layer is under the highways and lakes layers. We want the weather on top, because it is the most important layer for this map. Click on the 'Legend' tab. The Legend Panel shows you the layers that are currently in the map. On the right side of that panel there are up and down buttons next to each of the overlay layers. Click on the up button next to the 'Weather Radar Current' layer. Notice that it immediately jumped up one layer in the stack; it is now above the highways layer. Click on it one more time to move it above the lakes layer.
7. Add other layers — Just to add some color, I added two more layers: 'Foresetland' and 'Shaded Relief.' You can look for them in the layer folders or search for them in the Search panel. Remember to adjust the layer stack when you are done.
8. Save the Map — When you have the layers the way you like them, click on the 'myLayers' tab. A button label 'Save view as map' will appear. When you click it a window will popup asking for a name for the map. Call it 'Weather in Northern Utah' then click okay. The map will appear in the panel on the left. Now you can access it any time you want by selecting it from the myMaps panel.